Pastel session
Some artists reveal their secrets, I found a mentor in Ardèche, Provence : Marie-Hélène YERNAUX, with whom I spent a fantastic week rediscovering pastel technique.
Regular progress shots allows me to relate the following step by step:
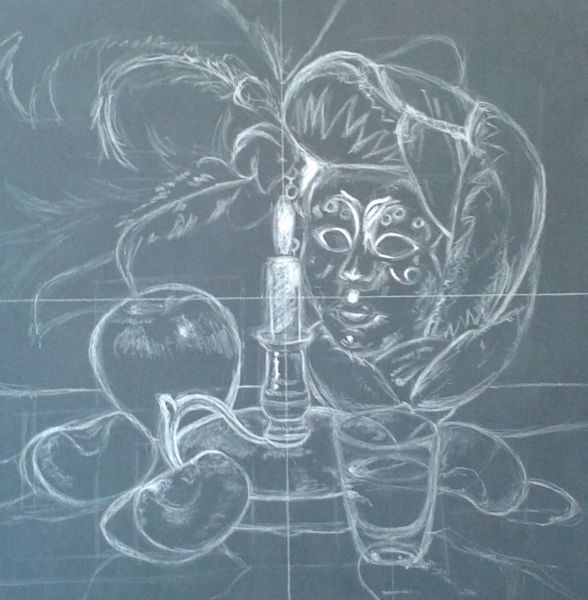
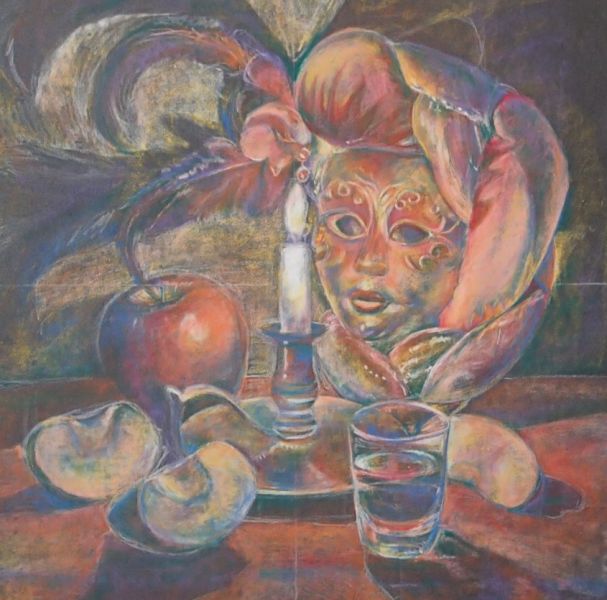
First of all, we work on a wide piece of paper (in this case, a deep gray Pastelmat), that allows free gesture and testing the colors around the edges of the sheet. The drawing is treated for a realist rendering.
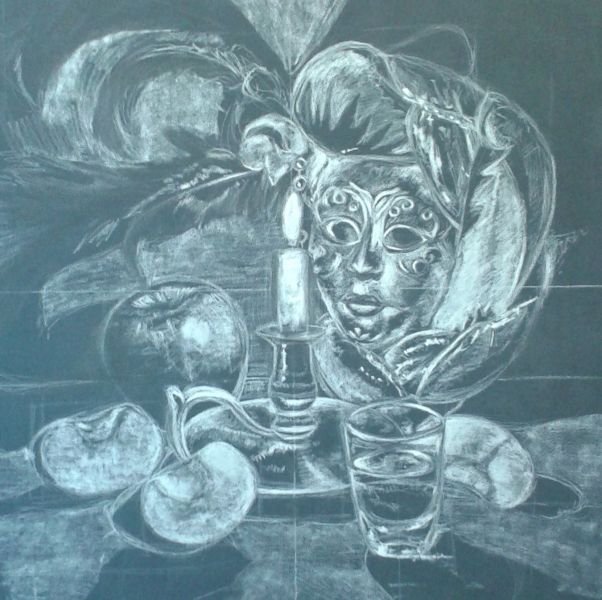
We proceed by working on the values of the drawing with a white chalk first. It is important to apply a light touch here, least we saturate the paper, as we will be adding layers progressively.

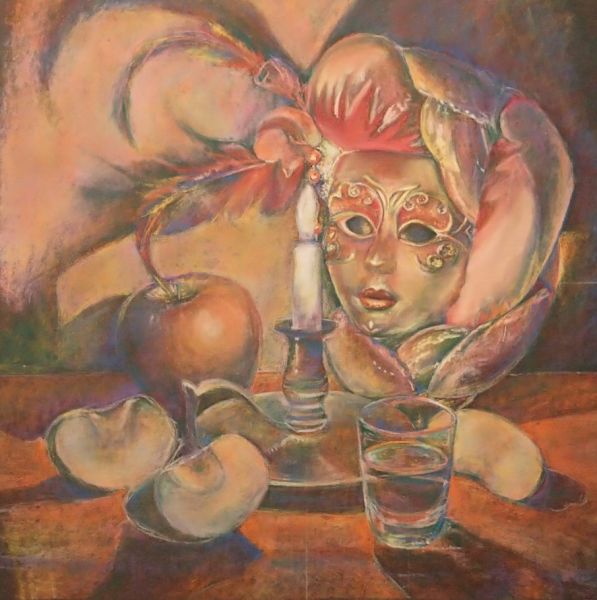
Using only two colour crayons, yellow and red in this case, we give the scene a predominantly warm hue. The lighter tones are simply obtained through the previous layer of white.
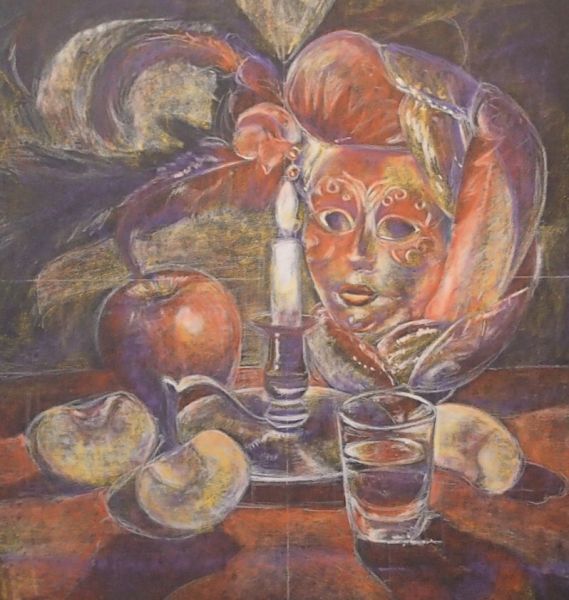
Then we use complimentary colours for the shadows. Starting here with violet…
…and then green.
We now work on the luminosity aspect by glazing with very light yellow, pink, and cyan pastels.
At this point we are leaving the realm of drawing and blend gradually the colors together withs fingers. Volumes are finally emerging.
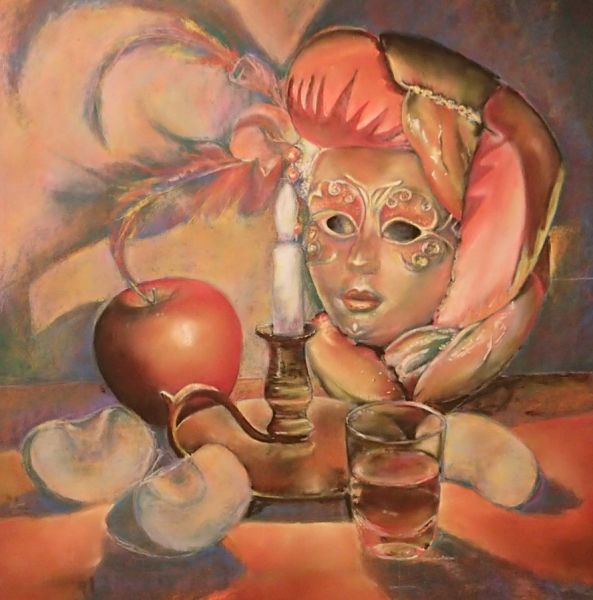
Soft pastels are now added within the same tonality range, this highlight underlying colors.
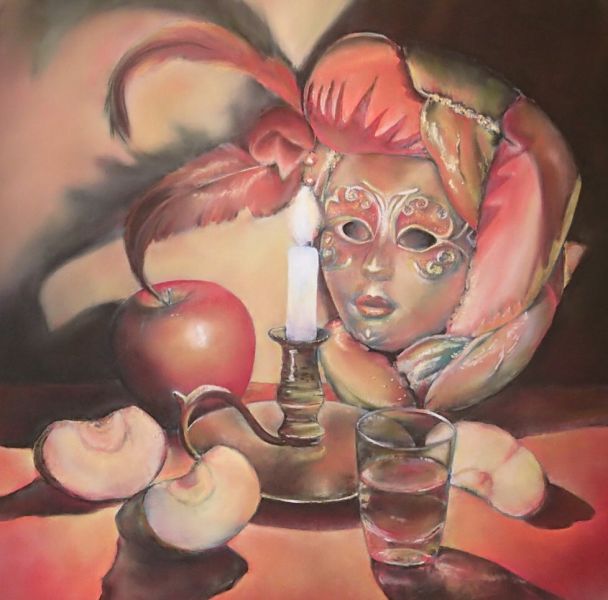
In this way, with a very limited number of pastels colours, we are able to interpret reflections, transparency and brightness.